If you’re looking to start a blog to promote your business, or boost your presence on the internet, you’ve probably heard of Wordpress.
You may also have heard about the benefits of hosting your own instance of Wordpress, but you’re intimidated by the idea of setting up and maintaining your own server, or trusting your business to a shared hosting solution.
What if I told you that I’ve got a solution that’ll let you run your Wordpress blog, on your very own server, with automated backups and disaster recover, completely free?
Wait wait! I know it sounds too good to be true, but don’t leave just yet, hear me out…
Amazon AWS Free Tier
First, let me be straight with you. When I say “free” I’m referring to the free tier of Amazon’s virtual computing and storage platform AWS.
This free tier allows you to run their smallest instance free for one year. In practice you actually end up paying them a very small sum (around $0.12 average for me thus far) each month for transfer costs to run a low to medium traffic blog.
After your first year of free usage has expried, it’ll start to cost around $15 per month to keep using the same size instance.
Managed by RightScale
You may be looking at AWS and thinking that setting up your own server, and keeping it running and backed up would be a daunting task, and it can be. That’s where RightScale comes into the picture.
RightScale offers a Free Developer Edition that gives you access to their shared library of ServerTemplates.
In that library is one little gem that I published, expressly for the purpose of running a server that hosts my blog, a few sites for other domains I own, as well as all of the email traffic for my various domains.
In fact, you’re reading this right now from a server running from this ServerTemplate.
Full Disclosure
Before I give you the skinny on how to start using these tools to host a Wordpress blog on your own virtual server, a few warnings are in order.
I am using Opscode Chef to configure the server. Chef support is currently in Beta on RightScale, meaning that they do not recommend you use it to configure and manage “Production” servers.
It also means that there can be some hiccups when you’re launching and configuring a server with this ServerTemplate.
So, don’t be surprised if the first time you launch your server, it doesn’t work. Try launching a second time.
Lastly, I can’t take any responsibility for any loss of self esteem, data, productivity, or sanity. You have been warned.
That said, I’m using this server to run the very blog you’re reading, and I haven’t had any significant glitches yet. RightScale is working as we speak to improve their support for Chef and things will only get better from here.
Haven’t scared you off yet? Okay, good.. Here we go..
20 Minute Quickstart
The RightScale management tool, and this ServerTemplate offer all sorts of cool functionality which we can explore later, but if you’re in a hurry to get started here’s all you need to know.
- Go sign up for an AWS Account
- Sign up for a RightScale Free Developer Edition
- Enter your AWS credentials into the RightScale dashboard using these directions
- Browse to my All-In-One ServerTemplate and click “Import”
- Click “Add to Deployment”
- Pick the AWS Cloud closest to you and click “OK”
- Change the “Instance Type” dropdown to “t1.micro”, and select the “default” Security Group from the dropdown. You can also provide you server a name, then click “Add”
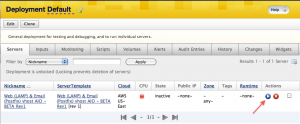
- Click the “Play” button, provide inputs for the Database Administrator password, Postfix DB password, and EBS volume size, then click “Save and Launch”
- Click on the server’s nickname, then navigate to the “Scripts” tab
- Run the “rjg_utils::aio_ebs_volume_enable_continuous_backup” operational script to make sure your server is backed up daily
- Run the “app_wordpress::deploy” operational script to setup Wordpress for your domain
- Navigate to your websites URL (we used http://ec2.ryangeyer.com in this example) and setup your Wordpress preferences
- Start Blogging!


And now.. We wait.. Until the instance is up and running..


What’s Next?
That’s really all there is to it. As I mentioned the ServerTemplate does a number of other cool things, which you can read about in it’s description.
The best part is that because this ServerTemplate is what I use for my own blog and email hosting duties, you can be sure that I’ll keep it up to date, secure, and be adding features fairly regularly.
Drop me a note
If you followed these directions, or if you’re using this ServerTemplate, or if you’re having trouble, by all means drop me a note in the comments here.
I’ll be happy to answer any questions I can, and I’d love to get a sense for how many people are out there running servers based on this template, it’ll keep me motivated to publish more stuff in the public ServerTemplate library!