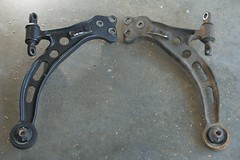
When I announced project late model restoration, I mentioned the badly worn front suspension as one of the main things that needed attention. Truth be told, the state of the suspension was really the catalyst for starting this project.
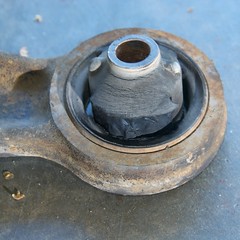
While performing other repairs I had noticed that the rubber bushings that anchor the lower a-arms were badly deteriorated. I was beginning to question the safety of the vehicle, so I put a plan in place to get the suspension back into shape.
The parts list for the suspension rehab consisted of four new KYB-GR2 struts, all of the accessories for assembling the struts including a set of Eibach “Pro-Kit” lowering springs, complete lower control arms with bushings, and of course wheels and tires.
Four Struts, Assembled Six Times
All four of the struts on the car were also badly worn. The previous owner had said that he replaced the struts only a few months prior to us buying the car. We’ve owned the car for about six years now, and I have no idea how, but the struts were completely done for.
Since I had bought all four new struts, and all of the ancillary parts for them, I had planned to assemble each of the struts before disassembling the suspension on the car. This would allow me to simply remove and replace the struts as complete assemblies, minimizing down time.
Only, it didn’t exactly turn out that way… I assembled (what I thought was) the front struts with the new springs. Only, the springs didn’t seem to match up with the lower spring perch quite the way I would have expected. After assembling two struts this way, I finally reviewed my part numbers and service manual. Turns out I had just assembled the rear struts…. with the front springs. DOH!
After disassembling the rear struts, and reassembling them with the correct parts the spring rested in the perch much more tightly. Almost like it was designed to work that way forehead smack
Then I got to work assembling the front struts, or so I thought. It turns out that the replacement front struts for the 1992 ES300 requires that you reuse the spring perch from the original strut.
So much for assembling the new parts without dismantling the car!
After some more confusion over parts compatibility, and some more fumbling, I got the front struts assembled, and all four struts installed in the car.
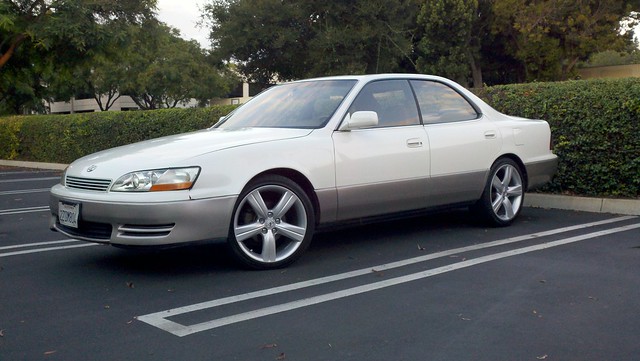
As I mentioned earlier, I chose to replace the stock springs with the Eibach “Pro-Kit” springs. These are advertised to offer a bit of a dropped stance, in the amount of one inch. This was right in the goldilocks zone for me since the car was going to continue to be used as a daily driver, so I didn’t want it “slammed” but I did want a slightly more aggressive stance.
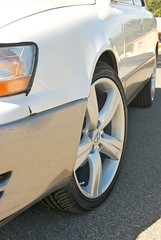
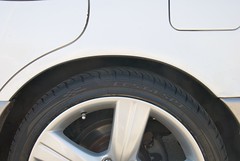
My exact results were 1.75” in the front, and .5” in the back as measured from the center of the hub to the top of the wheel well. This worked out especially well since the stock stance of the ES300 tends to place the front end higher than the rear. These springs both lowered the overall height, but also managed to level out the stock stance. Score!
(Lower Control) Arm Wrestling
You may be wondering why I bought the entire lower control arm, rather than just buying the bushings. The reason is pretty simple.
I’m lazy…
No really, that’s pretty much it. I didn’t want to have to wrestle with a vice, or hacksaw, or have to take the stock control arm to a suspension shop to have them press out the old bushings and press new ones in.
By buying the whole control arm with the bushings installed, it would be a simple remove and replace operation. Unfortunately, I was, again, sadly mistaken.
The torque specs for the bolts that fasten the control arms to the frame are in the > 200ft/lbs range. Worse than that, I somehow got completely turned around and was turning the bolts in the TIGHTEN direction when I was first trying to remove them. YARG!
After some significant effort and more than a little brute force from some pry bars and hammers, I had the control arms removed. Now time to put the new ones back in, easy, right?
Wrong!
Since the new control arms had nice new bushings, it was very difficult to manipulate them to get the holes lined up with the bolts. With more help from pry bars, hammers, and cursing the new control arms found their way home.
I had mentioned that the bushings were badly worn right? I’m not sure that they were doing anything at all to resist deflection, and I’m fairly certain that irreparable damage to both the car, and my person were eminent!
Fly new kicks
The final part of the equation was set of nice shiny new wheels and tires. The wheels are replicas of an OEM wheel for the Lexus GS300/400. They’re 18x8 with a +45mm offset, and they needed to be installed with a 1/8” spacer in the rear so that they didn’t make contact with the rear strut.
These are in my opinion the largest wheel you’re going to ever want to see on this car, but I think they look great. Since they came from another Lexus, the look is very subtle and it almost seems like they could have been a factory option for this car. Just the way I like it!
The tires are Kumho Ecsta SPT Ultra High Performance Summer tires sized at 225/40ZR18. Even though I drive the car year round, the summer tires are perfectly suited to the southern california weather. They have phenomenal amounts of traction in both wet and dry environments, and I’m very very happy with them.
Driving Impressions
It’s hard to make an apples to apples comparison between the new suspension system and “stock”, since I can never say that I truly experienced the stock suspension performing to it’s full potential.
With that said, this combination of suspension components provides very good ride quality. No, it’s not completely velvety smooth, but it is very comfortable for even long drives and it has the added benefit of changing directions quickly. Cornering and braking are both dramatically improved with very little perceived body roll.
If you wanted to have the best of both worlds, I would use the same suspension components, but stick with a smaller wheel and tire combo like a 16” or 17”. That said I’m perfectly happy with the results!
