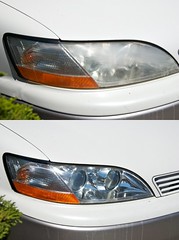
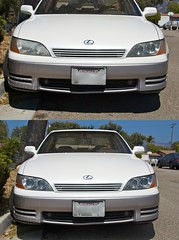
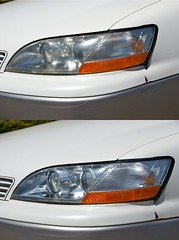
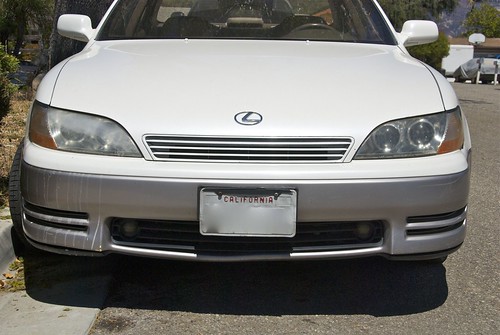
 A common affliction to older cars is that the headlights begin to become dull, or yellow over time. This had happened to our 1992 Lexus ES300 pictured above. To be fair, the passenger headlight is a little cloudier since I had done a little bit of wet sanding before I took the photo, more on that later though.
I am going to describe the process I used to restore the yellowed and oxidized headlights, but with that comes the disclaimer. This process is not advised, I can not be held responsible if you void your warranty, destroy your headlights, starve your dog, or burn down your house. Your mileage may vary..
 There are lots of “all-in-one” headlight restoration kits which have different materials and chemicals in them, and they all will work to varying degrees. However, I wanted to take the DIY approach. There are many other how to’s and lots of opinions about how this is done, I chose to wet sand to remove the oxidation then spray a few coats of clear and wet sand and polish again til nice and shiny. Here’s how I did it.
First, I wet sanded the lens with a 1500 grit paper. I used a spray bottle filled with water and maybe a quarter of an ounce of dish soap, and made sure to keep the lens nice and wet while sanding. Sand just enough to get rid of the yellowing, and get a uniform surface.
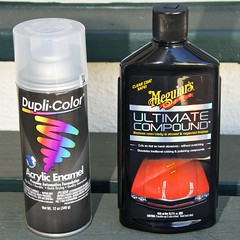
The next step was to spray on three coats of Dupli-Color Acrylic Enamel from an aerosol can. I followed the instructions of doing two light coats, then one medium wet coat, each coat separated by 10 minutes.
Then, I put two sheets of 2000 grit paper in a water and dish soap solution to soak overnight. After letting the paper soak and the paint dry over night, I used the same wet sanding process on the clear coat with the 2000 grit paper. I sanded until almost all of the orange peel was gone, but left it a teensy bit wavy so I had some material to remove in the last step.
In the last step I used some Meguiars Ultimate Compound for buffing. This buffed away the last of the orange peel and left a nice smooth shiny surface.
That’s all there is to it, and here’s the results!